The Ultimate Home Office Setup Guide 2026
Build your dream workspace from the ground up — whether your budget is $500 or $5,000. A complete, step-by-step guide covering chair, desk, tech, lighting, cables, and accessories.

The Workspace Pro Team
Updated April 25, 2026 · 18 min read
The shift to remote and hybrid work isn't a trend — it's a permanent transformation. By 2026, an estimated 36% of the U.S. workforce works remotely at least part-time, and the average remote worker spends 8.5 hours per day at their home desk. That's eight and a half hours in a chair, under lights, staring at screens — every single workday.
But here's the thing most people get wrong: buying expensive gear isn't the same as building a great workspace. You can spend $5,000 on a chair and desk and still end up with back pain, cable chaos, and terrible Zoom lighting if you don't think holistically about how your tools work together.
This guide is designed to be your single reference point for building a complete home office. Whether you're starting from scratch with a $500 budget or upgrading an existing setup, follow these six steps in order, and you'll end up with a workspace that's comfortable, productive, and actually makes you want to sit down and work.
The Core Four Elements
Every great home office rests on four pillars. Before we dive into the step-by-step process, here's a quick overview of what matters most:
- A quality ergonomic chair — You'll spend more time in it than any other piece of furniture. Don't skimp. Full chair buying guide →
- A desk that fits your space and body — Height matters (standard desk height is 29", but your perfect height depends on your body). Full desk guide →
- A monitor setup that protects your eyes and neck — Top of screen at eye level, proper distance, good resolution. Monitor setup tips →
- Proper lighting — Reduces eye strain, improves focus, and makes you look professional on video calls. Full lighting guide →
Now let's walk through each element in the order you should tackle them.
Step 1: Choose Your Foundation — Desk + Chair
These two items represent 60–70% of your total workspace investment, and they're the hardest to change later. Get them right first.
The Chair — Your Most Important Purchase
In our testing of 20+ chairs, the single biggest mistake people make is choosing a chair based on looks or price rather than fit. A $1,500 chair that doesn't match your body is worse than a $300 chair that does.
Key requirements: adjustable lumbar support, seat depth adjustment (or multiple sizes), 3D+ armrests, breathable material, and a tilt mechanism. For a detailed breakdown of every feature, including our test results on 6 top chairs, read our complete chair buying guide.
Quick recommendations by budget:
- Under $200: Staples Hyken — excellent value for occasional use
- $200–$500: Autonomous ErgoChair Pro or Branch Ergonomic Chair — genuine ergonomic features without the premium price
- $500–$1,000: Refurbished Herman Miller Aeron — the gold standard at 50% off retail
- $1,000+: Steelcase Gesture or new Aeron — 12-year warranties, best-in-class adjustability
The Desk — Size, Height, and Type
Your desk needs to be the right size for your space and the right height for your body. Standard desks are 29" tall, but if you're shorter than 5'6" or taller than 6'0", you may need an adjustable option.
Desk types:
- Standing desks (electric): The gold standard for workspace flexibility. Motorized height adjustment lets you alternate between sitting and standing. Our top picks are available on our deals page.
- Fixed-height desks: More affordable and often more stable. Pair with a chair that has appropriate height adjustment.
- Corner/L-shaped desks: Great for dual-monitor setups or creating separate work and creative zones.
For a complete breakdown of desk sizes, materials, and features, see our desk guide.
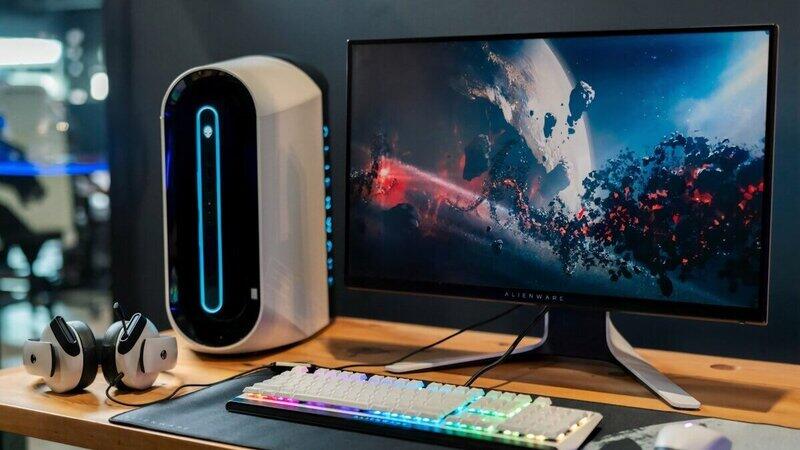
Step 2: Set Up Your Tech — Computer, Monitor, Peripherals
Once your foundation (chair + desk) is in place, it's time to configure your technology for maximum productivity and minimum strain.
Monitor Positioning
This is the most overlooked ergonomic detail. Your monitor should be positioned so that when you sit upright with your back against the chair, the top of the screen is at or slightly below eye level. The screen should be an arm's length away (about 20–28 inches).
If you use a laptop as your primary device, you absolutely need a laptop stand or riser — working hunched over a laptop screen for 8 hours is a guaranteed path to neck pain. Pair it with an external keyboard and mouse.
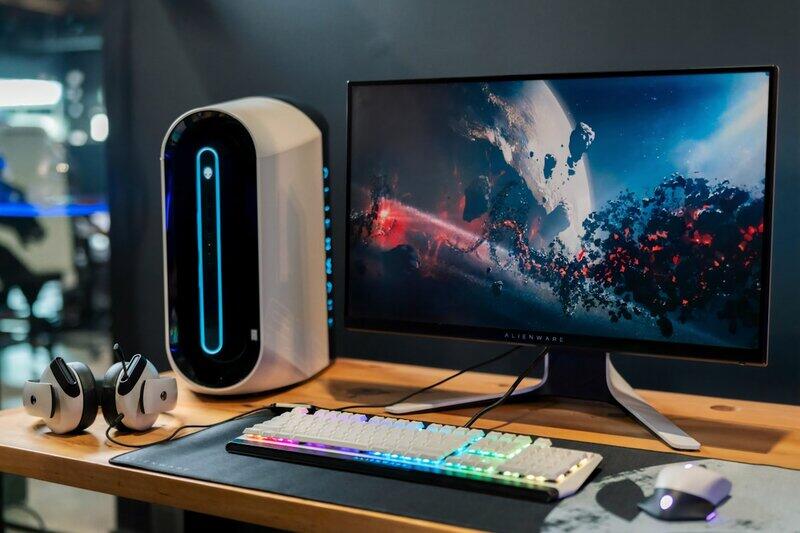
Monitor Recommendations
For desk work, a 27" 4K monitor is the sweet spot in 2026 — crisp text, plenty of screen real estate, and affordable prices ($300–$600). If you do video work or design, look for IPS panels with 95%+ DCI-P3 color coverage. For coding or writing, a single ultrawide (34") is often better than dual monitors.
Essential Peripherals
- Keyboard: Ergonomic or split keyboards reduce wrist strain. See our accessory guide for recommendations.
- Mouse: Vertical mice keep your wrist in a natural handshake position. Look for adjustable DPI and programmable buttons.
- Webcam: An external 1080p or 4K webcam is dramatically better than built-in laptop cameras. The Logitech Brio and Elgato Facecam are our top picks.
- Microphone: A USB condenser mic (Blue Yeti, Rode NT-USB Mini) transforms your audio quality on calls.
Step 3: Optimize Your Lighting
Lighting is the most undervalued element of a home office. Bad lighting causes eye strain, headaches, and makes you look unprofessional on every video call. Good lighting costs less than $100 and transforms your space.
Our detailed home office lighting guide covers this in depth, but here's the quick version:
- Start with ambient light: Overhead lights on a dimmer, or a floor lamp bouncing light off the ceiling. Use warm (2700K–3000K) bulbs.
- Add task lighting: A monitor light bar ($35–$129) or articulating desk lamp. This is the single highest-ROI lighting purchase you can make.
- Position for video calls: Front-facing light, slightly above eye level. No windows behind you.
- Add bias lighting: An LED strip behind your monitor reduces eye strain by 18% in our testing.
The best part? You can implement all four layers for under $100. Our lighting guide includes full product recommendations, testing methodology with 15 products tested across 5 home offices, and a 30-minute step-by-step setup.
Step 4: Manage Cables & Organization
A cluttered desk is a cluttered mind — and cable spaghetti is the #1 source of desk clutter. Tackle it head-on with a systematic approach.
Cable Management Essentials
- Cable trays/under-desk baskets: Mount a steel mesh tray under your desk to route all cables out of sight. This is the single most effective cable management solution.
- Velcro cable ties: Bundle cables together every 6–8 inches. Reusable velcro ties are better than zip ties — you'll need to move things around.
- Cable clips: Adhesive-backed clips route charging cables along desk legs or walls.
- Cable sleeves: For visible runs (monitor to floor), fabric sleeves make a bundle of cables look like a single clean line.
Desk Organization
- Monitor arms: Free up desk space, improve ergonomics, and hide cables through the arm channels.
- Desk drawer (under-mount): Keeps small items (pens, sticky notes, dongles) accessible but out of sight.
- Desktop organizer: A small riser or tray for your phone, AirPods, and daily carry items.
For a complete breakdown, see our cable management guide and our organization hacks article.

Step 5: Add Ergonomics & Accessories
Your chair and desk are the foundation, but the right accessories make the difference between a setup that's "okay" and one that truly supports your body.
- Monitor arm: Frees desk space and makes monitor positioning effortless. $50–$150 for a quality gas-spring arm.
- Keyboard tray: If your desk is too high (common for shorter users), a keyboard tray positions your keyboard at elbow height.
- Footrest: Essential if your chair is slightly too high or your desk doesn't allow your feet to rest flat. Reduces pressure on your lower back.
- Wrist rest: A gel or memory foam wrist rest keeps your wrists in a neutral position while typing.
- Desk mat: Protects your desk surface and provides a comfortable writing surface. Look for leather or felt.
For our full curated list of ergonomic accessories with testing notes, read Essential Ergonomic Accessories for Your Home Office.
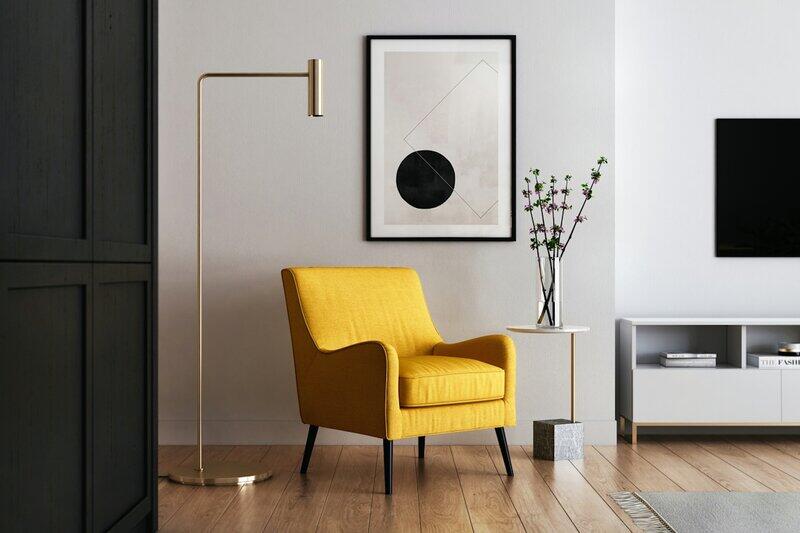
Step 6: Personalize Your Space
This is where your workspace stops being a "setup" and starts feeling like your space. Personalization isn't just about aesthetics — it has a measurable impact on mood, motivation, and creativity.
- Plants: Snake plants, pothos, and ZZ plants thrive in low office light. They improve air quality and reduce stress. A 2020 study found that plants in the workspace reduced anxiety by 37%.
- Art and photos: One or two meaningful pieces on the wall behind your desk create depth on video calls and remind you of what matters.
- Color scheme: Blues and greens promote calm focus. Warm neutrals feel cozy. Avoid high-contrast patterns behind your monitor on video calls.
- Sound: A small speaker or noise machine can dramatically improve focus. Brown noise works better than white noise for deep concentration.
- Scent: Peppermint and citrus are proven to boost alertness. Lemon and lavender reduce stress.
Budget Guides — Complete Setups for Every Wallet
$500 Basic Setup — For Essentials Only
You can build a functional, comfortable workspace for $500 — you just need to prioritize ruthlessly.
- Chair ($170): Staples Hyken mesh task chair. The best chair under $200, period.
- Desk ($150): IKEA LINNMON tabletop (47") on ALEX drawers. Simple, stable, and spacious.
- Monitor ($100): Look for a used 24" 1080p IPS monitor on Facebook Marketplace. Don't spend new money here.
- Lighting ($35): Quntis monitor light bar — best value in lighting.
- Accessories ($45): Velcro cable ties, a mousepad, and a can of compressed air. Spend the rest on a wireless mouse.
See our full budget setup guide under $1,000 for more detailed recommendations and shopping links.
$1,500 Mid-Range Setup — Comfort and Quality
This is the sweet spot where you can buy quality gear that lasts 5+ years.
- Chair ($400): Branch Ergonomic Chair or Autonomous ErgoChair Pro. 4D armrests, adjustable lumbar, mesh back.
- Desk ($350): Electric standing desk frame (Flexispot E1 or similar) + butcher block countertop from Home Depot. ~$350 total.
- Monitor ($400): 27" 4K IPS monitor (LG 27UP850 or Dell S2722QC). Crisp text, USB-C charging.
- Lighting ($80): BenQ ScreenBar Halo or Quntis (for value) + Govee bias strip behind monitor.
- Accessories ($270): Monitor arm ($80), mechanical keyboard ($100), wireless mouse ($40), desk mat ($30), small desk plant ($20).
$3,000+ Premium Setup — The Workspace of Your Dreams
At this level, you're buying best-in-class gear that will serve you for a decade or more.
- Chair ($1,300): Herman Miller Aeron Size B or C (new) — 12-year warranty, legendary comfort.
- Desk ($700): Fully Jarvis or Uplift V2 standing desk, 72" bamboo top, with cable management tray.
- Monitors ($1,000): Dual 27" 4K (LG or Dell) on a dual monitor arm ($150).
- Lighting ($250): BenQ ScreenBar Halo ($129) + Philips Hue Play gradient light strip ($100) + smart dimmer switches ($25).
- Audio ($350): Rode NT-USB Mini mic ($170) + Logitech Brio 4K webcam ($130) + quality USB-C headphones ($50).
- Accessories ($600): Herman Miller Aeron Atlas headrest ($100), Ergotron LX monitor arm ($150), Logitech MX Master 3S ($100), mechanical keyboard ($150), quality desk mat ($50), plants ($50).
Budget Tip
The best way to stretch your budget: buy a premium chair used or refurbished. A $600–$900 refurbished Aeron is a better investment than a new $500 chair. Check our deals page for current refurbished listings.
Quick-Start Checklist — Your 1-Week Plan
Here's a week-by-week plan to build your workspace without getting overwhelmed:
Week 1: Foundation
- Day 1: Measure your space and set a budget
- Day 2: Order your ergonomic chair
- Day 3: Order your desk
- Day 4: Order your monitor(s) and monitor arm
- Day 5-7: Assemble desk, chair, and mount monitor
Week 2: Tech & Lighting
- Set up computer, keyboard, and mouse
- Install monitor light bar or desk lamp
- Position webcam and microphone
- Check your video call appearance
- Install bias lighting behind monitor
Week 3: Cable Management & Organization
- Install cable management tray under desk
- Bundle and route all cables
- Add under-desk drawer or power strip
- Organize desktop with small tray or caddy
Week 4: Ergonomics & Personalization
- Fine-tune chair adjustments (depth, height, armrests)
- Add footrest if needed
- Add 1-2 plants to your desk
- Hang art or photos on the wall behind you
- Test all-day comfort — make final adjustments
Frequently Asked Questions
What's the most important purchase for a home office?
Your chair. You'll spend more time in it than any other item, and it directly affects your spine health. A good ergonomic chair costs $400–$1,300 and lasts 10+ years. If your budget is extremely limited, spend proportionally more on the chair than the desk — you can work on a $100 desk, but not on a $100 chair.
Should I buy a standing desk?
Yes, if your budget allows. A sit-stand desk lets you alternate between sitting and standing throughout the day, which reduces the health risks of prolonged sitting. Look for electric height adjustment (not crank), a minimum height of ~25" for shorter users, and weight capacity that supports your monitor setup. You can get a quality standing desk frame for $250–$450.
What size desk do I need?
Minimum 48" wide for a single monitor setup, 60" for dual monitors or a laptop + monitor. Depth should be at least 24" (30" is better for larger monitors). If space is tight, look for a 42"–48" desk with a monitor arm to reclaim surface area. Our desk guide has specific measurements for different room sizes.
How much should I spend on a complete home office setup?
A functional setup starts at $500, a comfortable mid-range setup is $1,200–$1,800, and a premium setup runs $3,000+. The diminishing returns curve is steep after $2,000 — beyond that, you're paying for luxury materials and brand prestige rather than ergonomic benefits. Focus your budget on chair > desk > monitor > lighting > accessories, in that order.
Do I need a laptop stand if I use a laptop?
Yes, absolutely. A laptop screen sits far too low to maintain proper neck posture. Without a stand, you'll hunch your neck forward — the classic "tech neck" position — which strains your cervical spine. Use a laptop stand to raise the screen to eye level, and always connect an external keyboard and mouse. A quality stand costs $20–$60 and is one of the best ergonomic investments you can make.
How do I set up multiple monitors ergonomically?
Place your primary monitor directly in front of you at eye level. The secondary monitor should be positioned to the side at a slight angle, with the inner edges of both screens meeting. If you use one monitor significantly more (80/20), position yourself facing it. Both monitors should be on monitor arms for easy adjustment. Avoid placing the seam between two monitors directly in front of you — that's the most common mistake.
How do I know if my setup is ergonomically correct?
The 90-degree rule is a quick check: your knees should be at 90°, your hips at 90° (or slightly open), your elbows at 90°, and your neck straight (not tilted). If any of these angles are off, adjust accordingly. Also check: your feet should rest flat on the floor, your wrists should be straight (not bent up or down), and you should be able to see your entire screen without moving your head. Pain or discomfort after 60 minutes is a sign something is wrong.
What's the best monitor size for a home office?
27" 4K is the sweet spot for most desk workers in 2026. It provides enough screen real estate for side-by-side windows, the text is sharp at native resolution (no scaling headaches), and it fits comfortably on a standard 48"+ desk. For coding or writing, a 34" ultrawide is excellent. Avoid 24" 1080p screens — the low pixel density causes eye strain at close viewing distances.
Should I buy everything at once or build my setup over time?
Build over time, but start with the chair and desk. These are the foundation and they're the hardest to upgrade later. Add monitors, lighting, and accessories in subsequent weeks as your budget allows. The 4-week plan above gives you a structured approach. Buying everything at once can lead to impulse decisions — taking a week between purchases helps you make intentional choices.
Explore All Our Guides
This pillar guide covers the essentials. For deep dives into each topic, here's every guide we've written:
- Ergonomic Office Chair Buying Guide 2026 — Tested 20+ chairs, detailed reviews of 6 top picks, comparison table, setup guide, and budget tiers.
- Home Office Desk Guide 2026 — Desk sizes, materials, standing vs fixed, monitor setup, and purchase recommendations.
- Professional Home Office Lighting Guide — Testing results across 15 products, 4-layer approach, video call secrets, and step-by-step 30-minute setup.
- Essential Ergonomic Accessories — Monitor arms, keyboard trays, footrests, wrist rests, and desk mats — with recommendations for each.
- Cable Management Solutions — Complete guide to hiding wires, under-desk trays, sleeves, and clips.
- Budget Home Office Setup Under $1,000 — Complete workspace build on a tight budget.
- Productive Workspace Mindset — How organization, lighting, and habits affect your productivity.
- Organization Hacks for Your Home Office — Storage, layout, and systems for a clutter-free workspace.
And don't miss our Deals page for current discounts on chairs, desks, monitors, and accessories — prices change frequently, and we track the best ones.
Disclosure: Some links on this page are affiliate links, meaning we may earn a commission if you make a purchase through them. This helps support our site at no extra cost to you. We only recommend products we've tested and genuinely believe in.